What Is a Kill Fee? Protect Freelance Income in 2026
Learn what a kill fee is, how to calculate it, and where to place it in your contracts so cancelled projects never cost you a paycheck.
 James · Content Manager July 4, 2026 6 min read
What Is a Kill Fee? Protect Freelance Income in 2026
Projects get cancelled. Clients pivot. Budgets shrink. When it happens mid-assignment, you are left with unpaid hours and a relationship that suddenly feels one-sided. A kill fee solves that exact problem. It is a pre-agreed payment that covers your time and reserved capacity when a client pulls the plug before project completion.
What Exactly Is a Kill Fee?
A kill fee is a contractual clause that guarantees partial or full payment when a client terminates a project early. Think of it as a cancellation penalty for the client, but framed as income protection for you. It is not a punishment. It is a professional boundary that says your availability has value, even if the work stops.
Kill fees show up most often in creative, development, and consulting retainers. A photography client cancels a shoot two weeks out. A SaaS startup drops a three-month build after six weeks. A marketing agency pauses a campaign mid-quarter. In every case, you have already invested planning time, blocked calendar space, or turned down other work to keep the slot open. The kill fee compensates for that loss.
Why You Need One (Even for Long-Term Clients)
Some freelancers hesitate to add a kill fee because they worry it sounds aggressive. It does not. It actually protects the relationship. When both sides know the financial terms of a cancellation upfront, there is less guesswork, fewer awkward refund requests, and fewer unpaid invoices sent into the void.
Long-term clients especially benefit from clear cancellation terms. Scope changes happen constantly. If a client decides to wind down a retainer after two months of a six-month agreement, a kill fee prevents you from absorbing the cost of their pivot. It keeps your cash flow predictable and your pricing honest.
How to Calculate a Fair Kill Fee
There is no single industry standard, but most freelancers land between 25% and 50% of the remaining contract value. The exact number depends on how much work you have already delivered and how much time you have blocked off.
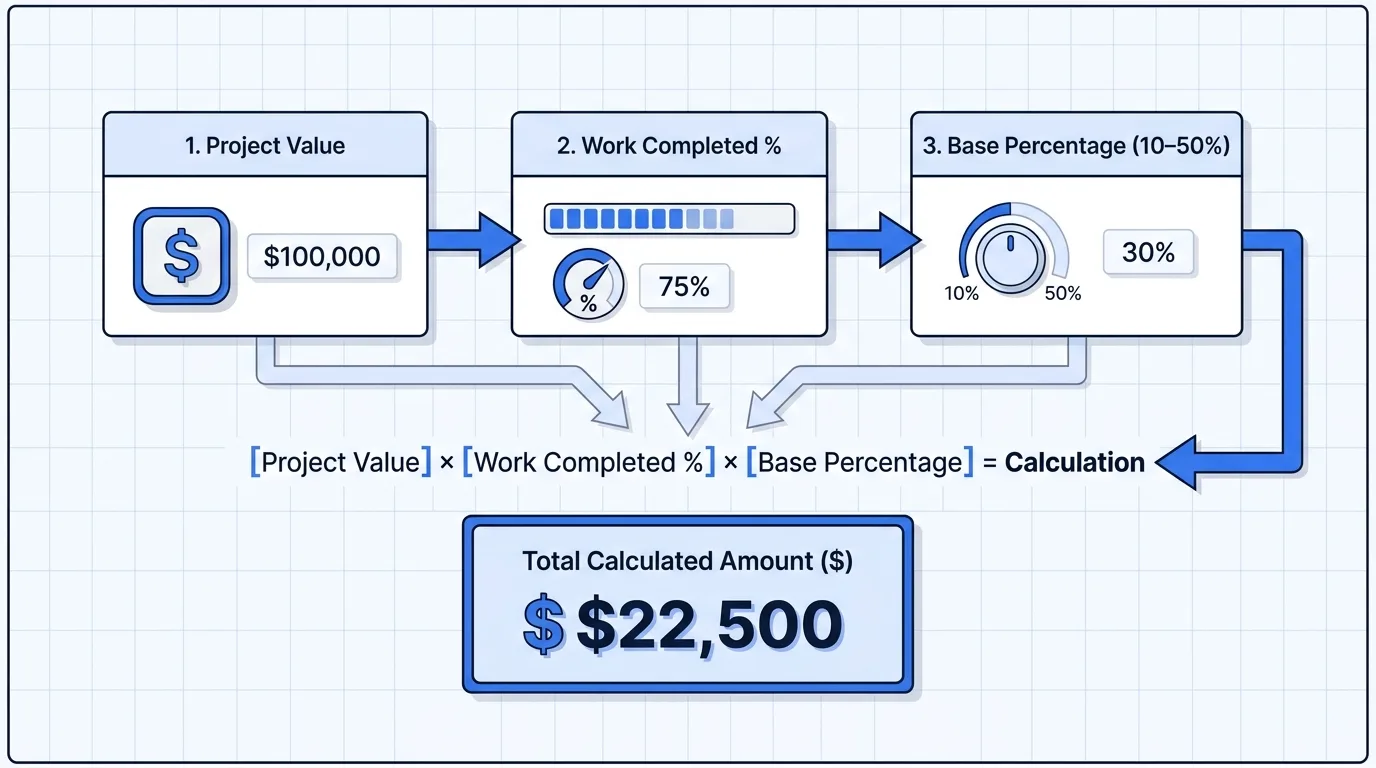
A practical baseline works like this:
- Early stage (0–25% complete): 50% of the remaining balance. You have done little, but you have reserved significant capacity.
- Mid stage (26–50% complete): 30–40% of the remaining balance. Tangible progress exists, but the client still owes for the unexecuted portion.
- Late stage (51–75% complete): 15–25% of the remaining balance. Most deliverables are done, but final revisions and handoff still require time.
- Final stretch (76–99% complete): 5–10% or a flat wrap-up fee. You are finishing up, but administrative close-out still costs hours.
Adjust the percentage based on your niche, client size, and how easily you can refill that calendar slot. High-demand specialists lean toward the higher end. Newer freelancers building portfolio pieces might negotiate a lower rate with a stricter notice period.
Notice Periods and Work-Stop Triggers
A kill fee clause only works if you define what triggers it and how much warning the client must give. Vague language like “if the client cancels” creates disputes. Specific language creates clarity.
Build your clause around these three triggers:
- Notice period: Require 14 to 30 days of written notice before termination. This gives you time to stop work, invoice accurately, and free up your schedule.
- Work-in-progress cutoff: State that any drafts, research, or partial deliverables delivered before the notice date are billable at 100%.
- Calendar hold fee: If the client cancels within 72 hours of a scheduled kickoff or milestone, charge a flat emergency cancellation rate.
When you spell out these triggers, you remove the gray area. The client knows exactly what happens if they hit pause, and you know exactly when to send the final invoice.
Where to Place the Clause in Your Contract
Cancellation terms belong in the termination section of your agreement, usually near the top third of the document. Clients scan for payment terms, scope, and exit clauses before signing. If the kill fee is buried in an appendix, it loses its protective power.
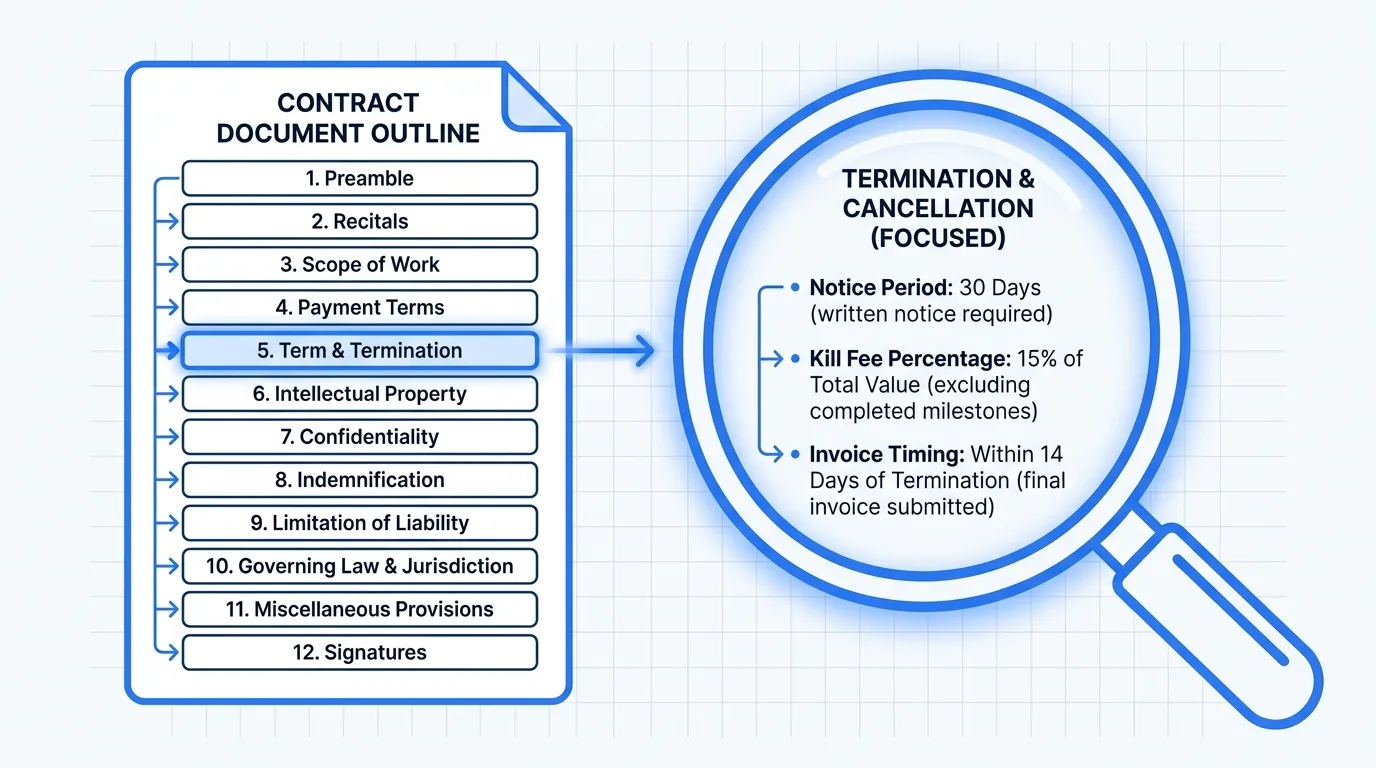
Structure the section like this:
- Header: Termination & Cancellation
- Notice requirement: Minimum days of written notice
- Kill fee schedule: Percentage or flat rate tied to project stage
- Work cutoff: What is billable if work stops mid-milestone
- Payment timeline: Net 7 or Net 14 for the kill fee invoice
Keep the language neutral. Use “project termination” instead of “cancellation penalty.” Frame it as a mutual scheduling protection, not a punishment. You can also add a small carve-out for force majeure or client-side compliance failures, so the clause does not trap you if the cancellation is caused by their legal or regulatory issues.
Real Talk: When Clients Push Back
Some clients will ask you to remove the kill fee during negotiation. A few will call it “unprofessional” or “too rigid.” How you respond depends on your leverage and your boundaries.
If you are the one chasing the contract, you might soften the clause: lower the percentage, shorten the notice period, or offer a one-time waiver. If you hold the leverage, keep the standard rate and explain that it protects both sides from sudden scheduling gaps. You can also offer alternatives:
- Credit instead of cash: Apply the kill fee toward a future project within 90 days.
- Scope freeze: Instead of cancelling, pause the project with a 10% hold fee that reactivates when they return.
- Tiered exit: Allow cancellation at any time, but require payment for all completed milestones plus a 15% admin fee.
The goal is not to trap the client. It is to make sure you are not paying for their indecision.
Quick-Start Checklist
Use this list before sending your next proposal:
- Define a kill fee percentage range based on your niche and experience level
- Set a minimum notice period (14, 21, or 30 days)
- Write a work-in-progress cutoff rule for partial deliverables
- Add a payment timeline for the kill fee invoice (Net 7 or Net 14)
- Include a force majeure or compliance carve-out
- Place the clause in the termination section, not the footer
- Review your draft against a proven contract template before sending
Design work has its own version of these terms; see our graphic design contract template for usage rights, source files and kill fee wording.
Protect Your Time, Get Paid for It
A kill fee is not about being difficult. It is about treating your calendar, your expertise, and your availability as the finite resources they actually are. When you put it in writing, you stop guessing whether cancelled projects will bleed your income, and you start pricing with confidence. If you want a clean starting point, AiDocX contract templates include ready-to-customize kill-fee and cancellation clauses that fit most freelance and contractor workflows. Pick a template, adjust the percentages to your rates, and send it out with the same professionalism you bring to the work itself.
See the clause in a full agreement in the videographer contract template and the artist commission contract template.
Ready to automate your documents with AI?
Start free with AiDocX — AI contract drafting, meeting minutes, consultation notes, e-signatures, and more in one platform.
Get Started FreeMore from AiDocX Blog
Machine Shop Job Traveler Template: Routing Sheet + Example
Copy a machine shop job traveler template for small job shops. Includes a routing sheet, filled example, traceability fields, sign-offs, and setup tips.
Weekly Status Report Template: 4 Formats + Examples
Copy one of four weekly status report templates for individual work, projects, leadership, or blockers. See a worked example and a practical review checklist.

How to Read a Business Contract: A Founder's Checklist (2026)
A practical way to review parties, scope, money, IP, liability, and exit terms before signing a business contract.
 MinjiLee October 7, 2026 9 min