
How to Create an Invoice: Manual Methods vs AI in 2026
Learn how to create an invoice using Word, Excel, PayPal, Canva, or AI. See what every invoice must include and avoid common payment delays.
 James · Content Manager August 21, 2026 16 min read
How to Create an Invoice: Manual Methods vs AI in 2026
Creating an invoice is more than typing a price and sending a payment request. A good invoice clearly identifies the transaction, gives the customer everything needed to pay, and creates a reliable record for your business. This guide compares Word, Excel, PayPal, Canva, and AI-generated invoices, then explains the information every invoice should contain.
What an Invoice Is and When You Need One
An invoice is a formal request for payment after you provide goods or services. It records what was sold, who sold it, who owes the money, how much is due, and when payment is expected.
Small businesses and freelancers use invoices for many types of work: consulting and professional services, design, writing, and development projects, marketing and social media management, photography, video, and creative production, repair, maintenance, and trade services, physical products and online sales, and retainers, subscriptions, and recurring work.
You usually create an invoice when a service is complete, a product has shipped, or a project reaches an agreed milestone. Some businesses invoice before work begins, especially when they require a deposit or advance payment. The timing should match the agreement you made with your customer.
An invoice is different from a receipt. An invoice asks for payment; a receipt confirms that payment has already been made. It is also different from an estimate or quote, which describes expected costs before the customer commits.
A professional invoice helps both sides. Your customer can route it through accounting or purchasing, while you have documentation for payment tracking, bookkeeping, tax preparation, and client communication. A vague invoice creates avoidable questions: what exactly was delivered, which dates does the charge cover, is tax included, when is payment due, which payment method should the customer use, and who should the customer contact about billing.
Answering those questions inside the invoice reduces delays. It also makes your business appear organized, even if you are a solo operator.
Before creating one, check your contract, purchase order, proposal, or client email. Look for the agreed billing amount, currency, payment schedule, tax treatment, billing contact, purchase order number, and required invoice format. Some larger customers reject invoices that omit a reference number or use the wrong legal entity name.
What Every Invoice Must Include
Invoice requirements vary by country, industry, and tax status. The safest approach is to include more useful detail than the minimum and verify local rules with an accountant or tax authority. At a minimum, a complete invoice should contain the following.
1. A clear invoice label
Use the word "Invoice" prominently near the top. Do not make the customer guess whether the document is a quote, statement, receipt, or bill.
2. A unique invoice number
Assign every invoice a unique identifier, such as INV-2026-001 or ACME-1048. A consistent numbering system makes it easier to match payments, find records, and identify missing invoices.
Do not reuse an invoice number, even after canceling an invoice. If you need to correct one, issue a credit note or replacement invoice according to your local process and keep an audit trail.
3. Issue date and due date
The issue date shows when the invoice was created. The due date tells the customer when payment is expected.
You can also state the payment term in plain language: due on receipt, net 15, net 30, due within 14 days of the invoice date, or 50% due at booking and 50% due on completion.
Avoid relying only on "Net 30" if your customer may not use that terminology. Writing the actual calendar due date removes ambiguity.
4. Your business details
Include the legal or trading name of your business, business address, email address, phone number, and website if relevant. Depending on your jurisdiction, you may also need to include a business registration number, tax identification number, or VAT/GST registration number.
If you operate under a brand name but receive payments through a different legal entity, make the relationship clear. The name on the invoice should match the name your customer is authorized to pay.
5. Customer details
Identify the customer accurately. Include the customer's name or legal business name, billing address, email address, and contact person when appropriate.
For business clients, check whether they require a specific entity name, department, location, or accounts-payable email. Sending an invoice to the project manager instead of the billing team is a common cause of delay.
6. Description of goods or services
Describe what you provided in enough detail for someone outside the project to understand it. "Services rendered" is rarely useful. Better descriptions include: website accessibility audit completed March 1-5, three hours of bookkeeping support for February, brand identity package including logo, color palette, and usage guide, or monthly content management for April 2026.
For products, include the product name, quantity, unit price, and any relevant SKU. For services, include hours, milestones, dates, or deliverables when those details support the charge.
7. Prices, quantities, and subtotal
Show the calculation rather than presenting only one unexplained total. A typical line-item table includes:
| Description | Quantity | Rate | Amount |
|---|---|---|---|
| Design consultation | 2 hours | $100 | $200 |
| Brand guideline revisions | 1 | $350 | $350 |
Then show the subtotal, discounts, taxes, fees, deposits already paid, and final amount due.
8. Currency and tax information
State the currency clearly, especially when working with international customers. Use a recognizable format such as USD, EUR, GBP, CAD, or AUD.
If you charge sales tax, VAT, GST, or another tax, show the applicable rate and amount separately. If you are not registered to charge tax, do not add one merely because a template has a tax field. If a special tax treatment applies, include the required wording for your jurisdiction.
Tax rules can depend on where you and your customer are located, what you sell, and whether the customer is a business or consumer. An invoice template cannot determine your legal obligations by itself.
9. Total amount due
Make the final amount visually obvious. Label it "Total due," "Amount payable," or equivalent. If the invoice includes a deposit or previous payment, show how you arrived at the remaining balance.
For partial invoices, state whether the amount is a deposit, progress payment, milestone payment, or balance due. This prevents a customer from assuming the invoice represents the entire project price.
10. Payment instructions
Tell the customer exactly how to pay. Depending on your business, this may include bank name and account details, payment link, PayPal address, card payment instructions, check or money order details, payment portal URL, and accepted currencies.
Never paste sensitive banking credentials or account passwords into an invoice. Use the payment details your bank or payment processor provides and double-check them before sending.
11. Notes and terms
Use a short notes section for information that affects payment or delivery. Examples include "Thank you for your business," "Please reference invoice INV-2026-001 with your payment," "Late fees apply only as stated in the signed agreement," "Ownership transfers after full payment," and "This invoice covers the second project milestone."
Do not use the notes field to introduce major terms the customer never accepted. Invoices should document the deal, not quietly rewrite it.
How to Create an Invoice in Word
Word is a practical choice when you need a simple, professional-looking invoice and do not have many complex calculations.
Step 1: Start with a template or blank document
A template gives you a starting structure with a business header, customer block, line-item table, totals, and notes. A blank document gives you more control but requires more formatting.
Choose a clean layout with enough white space. Avoid decorative backgrounds, tiny text, or colors that make the document difficult to print.
Step 2: Add your business header
Place your business name, logo if useful, contact information, and the word "Invoice" near the top. The invoice number, issue date, and due date should be easy to locate without scanning the entire page.
Step 3: Add customer and project details
Create a "Bill to" section for the customer. Add a project name, purchase order number, or service period if the customer needs it for internal processing.
Step 4: Build the line-item table
Use columns for description, quantity, rate, and amount. Keep each description specific. If you are billing a fixed project fee, quantity can be 1 and the description should explain the deliverable.
Word can perform basic formulas in tables, but its calculation features are less convenient than a spreadsheet. For a multi-line invoice, calculate the totals independently and verify them before sending.
Step 5: Add payment terms and export as PDF
Save the editable Word file as your internal source. Export the customer-facing version as a PDF so the layout does not change across devices.
Before sending, inspect the PDF page by page. Look for cut-off text, broken tables, missing logos, incorrect dates, and a final total that does not match your calculation.
Word works best for occasional invoices, fixed-price projects, invoices with a polished letter-style layout, and businesses that want a reusable document template. It becomes less efficient when you send many invoices, bill hourly, manage recurring customers, or need automatic payment status tracking.
How to Create an Invoice in Excel
Excel is useful when invoice calculations are the main challenge. It can calculate quantities, rates, discounts, taxes, and totals consistently.
Step 1: Set up the invoice structure
Create sections for your business, customer, invoice number, dates, payment terms, line items, totals, and payment details. Keep the printable invoice area separate from notes or calculation helpers.
Step 2: Use formulas for line amounts
If quantity is in column B and rate is in column C, the amount in column D can use a formula such as =B12*C12. For a subtotal, use a range: =SUM(D12:D20).
A discount or tax can be calculated from the relevant subtotal. Use formulas instead of typing totals manually, but do not assume formulas are correct without checking them.
Step 3: Lock or protect formula cells
Accidentally replacing a formula with a number is a common spreadsheet mistake. Protect cells that contain calculations and leave only invoice number, customer details, dates, descriptions, quantities, and rates editable.
Step 4: Format the sheet for printing
Set the print area, page size, margins, and scaling. Check that the invoice fits on one page unless a multi-page invoice is genuinely necessary. Add a footer with your business name or page number when appropriate.
Step 5: Save a clean PDF
Keep the Excel workbook as your internal working file and send the customer a PDF. Confirm that formulas have recalculated before exporting, particularly if the file was edited on a different device or opened in another spreadsheet application.
Excel works best for hourly or quantity-based billing, recurring invoices, businesses that need detailed calculations, invoices with discounts or multiple tax lines, and owners who want to customize their own formulas. Its main risks are formula errors, inconsistent copies, hidden rows, accidental edits, and sending the spreadsheet instead of a final PDF.
How to Create an Invoice with PayPal
PayPal can create an invoice and connect the customer directly to an online payment flow. This is convenient when your customer already uses PayPal or you want a payment link included with the request.
Step 1: Open the invoicing area
Sign in to your PayPal business account and open the invoicing feature. The exact menu names and options may vary by country, account type, and product updates.
Step 2: Enter customer information
Add the customer's email address and billing details. Confirm the address carefully because the invoice and payment notification may be sent there automatically.
Step 3: Add line items
Enter the products or services, quantities, rates, discounts, shipping charges, and applicable tax fields. Describe services clearly instead of relying on a generic label.
Step 4: Set dates and payment options
Choose the invoice date, payment due date, accepted payment methods, and any reminders. Review whether automatic reminders or partial payments fit your agreement with the customer.
Step 5: Preview and send
Preview the invoice before sending it. Check the business name, total, currency, payment instructions, and customer email. Keep a copy of the invoice and record when it was sent.
PayPal is convenient because it combines invoice delivery and payment collection. However, it may not be the best fit when your customer requires a custom PDF, purchase order workflow, specific tax wording, or payment by bank transfer. Fees, currency conversion, account limitations, and availability vary, so review the terms that apply to your account.
You can also create a PDF invoice separately and add a PayPal payment link, but make sure the amount and currency match exactly. A payment link that does not correspond to the invoice creates reconciliation problems.
How to Create an Invoice in Canva
Canva is useful when visual presentation and branding matter. It offers more control over colors, logos, typefaces, and layout than a basic Word document.
Step 1: Choose an invoice layout
Search for an invoice template or start with a custom page. Pick a layout with a readable line-item table and enough room for payment details. A design that looks attractive but hides the due date is not effective.
Step 2: Apply restrained branding
Use your logo, brand colors, and one or two typefaces. Keep the invoice easier to scan than a marketing brochure. Strong contrast and consistent alignment matter more than decorative elements.
Step 3: Add the required information
Replace every placeholder with real data. Confirm the invoice number, dates, customer details, line items, tax, currency, total, payment terms, and payment instructions.
Step 4: Check the design at normal size
Zoom out and view the invoice as a customer would see it in an email or PDF viewer. Make sure small text remains legible and that the total due is prominent.
Step 5: Download as PDF
Use a high-quality PDF format suitable for sharing. Do not send an editable Canva link unless the customer specifically requests one. Retain the original design as a template, but create a new copy for every invoice.
Canva works well for creative freelancers, studios, event businesses, and service providers who want a branded document. It is less suitable for large invoice volumes or invoices requiring complex calculations. Use a spreadsheet or accounting system to verify the numbers before placing them in the design.
Manual Invoices vs AI-Generated Invoices
The best invoice method depends on your volume, complexity, and tolerance for repetitive work. There is no requirement that every business use the same tool.
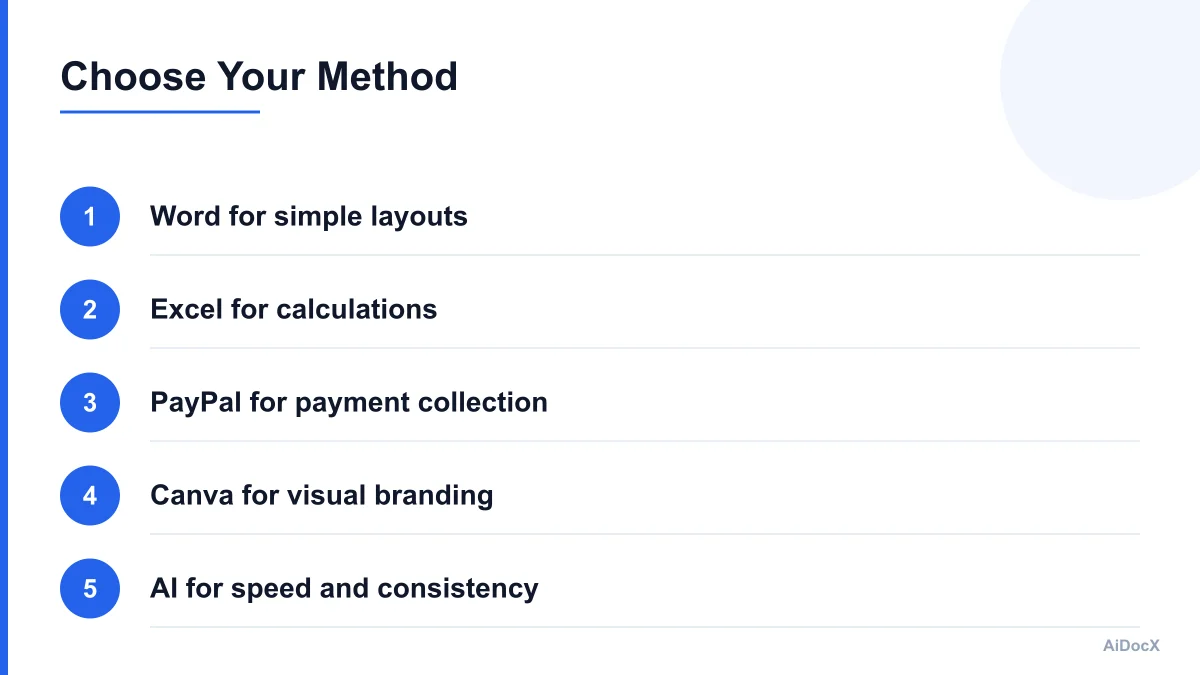
| Method | Main advantage | Main limitation |
|---|---|---|
| Word | Flexible, familiar layout | Manual calculations and edits |
| Excel | Strong formulas and repeatability | Can contain formula or formatting errors |
| PayPal | Direct online payment collection | Less flexible for custom workflows |
| Canva | Strong visual branding | Not designed for complex calculations |
| AI generator | Fast drafting and consistent structure | Requires human review and local compliance checks |
Manual tools give you direct control. They are appropriate when you create only a few invoices, already have a trusted template, or need a specialized layout. They also make it easy to preserve your own process and records.
The tradeoff is repetition. You may copy the wrong customer address, forget to change the invoice number, leave last month's date in place, calculate tax incorrectly, or send an invoice without payment terms. These errors are usually small but can delay payment or create accounting work later.
AI-generated invoices reduce the time needed to turn structured information into a complete draft. You can provide the customer, service description, amount, date, currency, and payment terms, then review the generated document before sending it. AiDocX's AI invoice generator creates a compliant invoice in seconds, which is useful when you need a polished starting point quickly.
AI should assist with preparation, not replace your review. Before sending an AI-generated invoice, verify the legal names of both parties, the invoice number and issue date, the due date and payment terms, every quantity, rate, discount, and tax amount, the currency and final total, required tax or registration wording, payment instructions, and the correct customer email and attachment.
Do not enter confidential customer data into an AI tool unless you understand how the information is handled and your business has approved the workflow. Use a service that provides appropriate privacy and access controls, especially for invoices containing addresses, tax identifiers, bank details, or project information.
The strongest process is often hybrid: use AI to draft the invoice, a spreadsheet or accounting system to validate calculations, and a PDF workflow to send and archive the final document.
A Practical Invoice Workflow for 2026
A reliable invoice process should work whether you send two invoices a month or twenty a week.
1. Agree on billing details before work begins
Your proposal or contract should state the price, billing schedule, payment terms, expenses, taxes, currency, and accepted payment methods. Invoice problems often begin as unclear project terms.
2. Store customer information in one place
Keep the customer's legal name, billing address, contact email, tax details, purchase order requirements, and preferred payment method in a secure system. Avoid retyping this information from old invoices.
3. Use a consistent numbering system
Choose a pattern and keep it across the year. For example: INV-2026-001, INV-2026-002, INV-2026-003.
If you use multiple brands or entities, include a short prefix to avoid collisions.
4. Create the invoice promptly
Send the invoice when the agreed milestone occurs. Waiting several weeks can make a customer question the charge and makes cash-flow forecasting harder.
5. Run a two-minute review
Compare the invoice with the contract, purchase order, or project record. Recalculate the total and check the recipient before sending.
6. Send and track it
Record the date sent, due date, amount, and status. Use a simple spreadsheet, accounting platform, or invoice tracker. Schedule a polite reminder before or shortly after the due date.
7. Reconcile payment
When payment arrives, match it to the invoice number. Record fees, partial payments, credits, and currency differences. Mark the invoice paid only after the funds have cleared according to your process. It's good practice to issue the payer a receipt at this step too — see our AI receipt generator guide for the fields a proper receipt needs.
8. Archive the final version
Store the sent PDF, supporting records, and payment confirmation in a secure location. Use a consistent filename such as 2026-04-15_INV-2026-014_Client-Name.pdf.
This workflow creates a clear trail from agreement to payment and makes year-end bookkeeping easier.
Shipping internationally? See how a proforma invoice differs from a commercial invoice, with templates for both.
Common Mistakes and Final Checklist
Even a well-designed template cannot prevent every invoice mistake. Watch for these problems.
Using vague descriptions
A line that says "work completed" does not help a customer approve payment. Add the service, period, milestone, or deliverable.
Forgetting the due date
An invoice without a clear due date leaves the customer to guess. State both the payment term and the actual date.
Mixing currencies
If your price is in euros but the payment link is in dollars, the customer may pause the transaction. Make the currency consistent everywhere.
Adding the wrong tax
Never copy a tax rate from an old invoice without checking whether it applies to the current customer, service, location, and registration status.
Sending an editable file
An editable Word or Excel file can be changed accidentally and may expose internal notes or formulas. Send a final PDF unless another format is required.
Reusing invoice numbers
Duplicate numbers make payment matching and audits difficult. Maintain a simple invoice register.
Omitting payment instructions
A customer should not need to email you to ask where to send money. Include a clear payment method or link.
Changing terms after the fact
Do not add late fees, ownership clauses, or major conditions to an invoice if they were not part of the agreement. Discuss and document changes separately.
Use this final review before sending:
- The document is labeled "Invoice."
- The invoice number is unique.
- Issue date and due date are correct.
- Your business details are complete.
- Customer legal name and billing details are correct.
- Services or products are described clearly.
- Quantities, rates, discounts, and taxes are accurate.
- Currency is shown consistently.
- The final amount due is easy to find.
- Payment instructions work.
- Required tax or registration details are present.
- The invoice matches the contract or purchase order.
- The file has been exported and reviewed as a PDF.
- A copy has been saved and the payment status can be tracked.
For most small businesses and freelancers, the right invoice method is the one that produces accurate documents consistently. Word is enough for occasional fixed-fee work, Excel helps with calculations, PayPal simplifies online collection, Canva supports branded presentation, and AI speeds up the drafting process. Choose the workflow that fits your volume, review every invoice before sending it, and keep a complete record from the first invoice through final payment.
For goods, it helps to quote the delivery note number on the invoice so the customer can match it.
Ready to automate your documents with AI?
Start free with AiDocX — AI contract drafting, meeting minutes, consultation notes, e-signatures, and more in one platform.
Get Started FreeMore from AiDocX Blog

How to Read a Business Contract: A Founder's Checklist (2026)
A practical way to review parties, scope, money, IP, liability, and exit terms before signing a business contract.
 MinjiLee October 7, 2026 9 min
ESIGN vs eIDAS: What Founders Should Know About E-Signatures (2026)
What U.S. ESIGN and EU eIDAS actually say, where exceptions apply, and what founders should keep to document an electronic signing.
MinjiLee October 7, 2026 7 min
Does Document Automation Pay Off? An ROI Worksheet for Founders (2026)
Estimate document automation ROI with your own volume, time, labor, and software costs. Includes a clearly labeled example and break-even formula.
 Chloe October 7, 2026 8 min